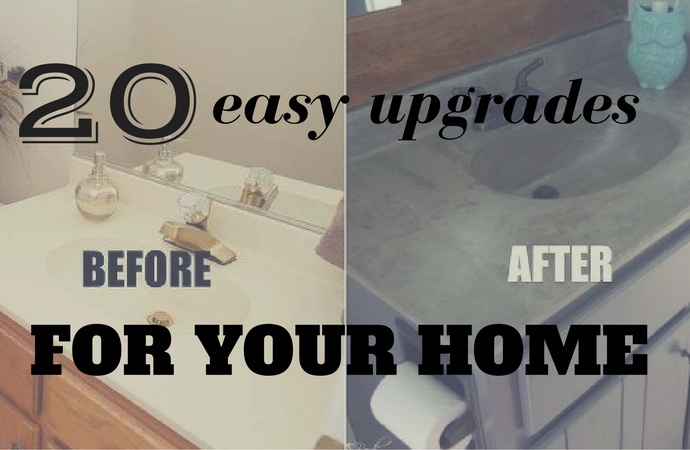
20 Easy Upgrades For Your Home

I am always looking for ways to spruce up my home without spending a lot of money. Lets face it, we all love a great DIY project that is also friendly to the wallet.  There is just something about looking at a project and knowing that you did it that makes me feel good. Check out these easy and affordable upgrades that you can do in your own home.

1.) Plant baskets

Adding baskets to planters in your home adds flair and makes it look expensive. I found baskets marked down to $5.00 each at Target and I have started to add these to the plants around my house. I love this look!

2.) Paint hardware and vents

Rusteloum “oil rubbed bronze” is one of the best products for sprucing up a home. One $8.00 can of spray paint can refresh your hardware (door knobs, cabinet hardware, sink faucets) and make them seem new. I have spray painted almost all the hardware in my home and even went as far to spray paint my brass shower doors! Literally a brand new look.

See the directions here.

3.) Add canvases

Do you need pops of color or artwork in your home, but do not want to spend a ton of money? Create your own art using a canvas and hang.  Bonus: you do not even have to frame them!

See the directions here.

4.) Pillow case covers

My taste in items change frequently and lately I have not been feeling my couch pillows.  I was tempted to throw them out and purchase new ones until  a thought occurred to me.  It would be so much cheaper to just buy pillow covers and give them an update.  If you like to sew you can also make your own, but that is not up my alley.

Continue Reading

Declutter Series: How Decluttering Saved Me Money

My husband and I bought our home 5 years ago, this month. We moved in with enough furniture (bed, sofas, side tables) for the basics. I remember looking around in our home and thinking “how are we ever going to fill this home?”. Fast forward to 5 years later (and 2 kids) and now I look around thinking “where did we get all this stuff”.

A few weeks ago, I was standing in our bedroom.  The floors were filled with clothes, our kid’s toys, shoes and other miscellaneous treasures hiding from eye sight. I was stressed. No matter many how many hours I would spend cleaning and tidying it never stayed that way for more than an hour.

The clutter was so distracting that I could not focus when it came time for me to sit down to work. I would look around and my mind immediately shifted me into “clean” mode before I could begin to focus on the task at hand.

I thought to myself, “there has to be a better way to clean and stay clean”.

I began some research and ran across the idea of minimalism. No, I don’t consider myself a minimalist (yet…), but it has made me reconsider my whole concept of my belongings and how much I really need.

I picked up The Life-Changing Magic of Tidying Up, which I recommend! The overview of the “KonMari” tidying process is simple.  Does a specific item bring you joy? If not, get rid of it. I never realized how many items I was surrounded by that I had just because. Just because I wanted another black dress. Just because two cutting boards sounded better then one. Just because my favorite movie came out on DVD (while also being available on Netflix).

Realistically they served no purpose, function and they did not bring me joy.

One of the many piles of discarded items to be donated.

As I mentioned before, I am not a minimalist to the degree of its definition. What I did find in the lifestyle of minimalism is clarity and frugality. Clarity, in respect to feeling as if the process of decluttering and letting go of non essential items decreased my stress. Frugality in its very meaning. Letting go of items that serve minimal purpose, has given me the opportunity to save dollars and shop smarter.

So far we have decluttered close to 1/3 of our home and you know what? My spending has decreased! I no longer feel the urge to purchase random items when out shopping.

Below is a list of benefits that you will truly experience right away. Benefits that are visible and non visible. I hope that you are able to breathe a little easier and enjoy life with happiness first.

1.) Less stress

With less clutter comes less cleaning which equals less stress. I now walk into our bedroom and feel relaxed, which is how each person should be able to feel in their own personal space.

2.) More time to focus on other things

When you have less belongings there is less to clean.  I have noticed, even within the first month, that I have more time during the day to focus on other things. I no longer have to walk into our home office and begin tidying before I can sit down to focus on my work. Imagine the things you can accomplish with an extra hour added to your day!

3.) Less spending

Before putting an item in my cart, I consider the purpose of the item. Does this item serve a function? Do I know exactly where the item will go in my house? Will this item bring me joy in my home? I learned that many of my purchases were in the moment. “Oh look, this vase is 70% off!”. Yes, the vase may have been 70% off, but I simply made a purchase because the price of the item was low, not because I actually needed a vase.

4.) Sell your items

One of the areas in our home that I began to declutter is my children’s toys. Trust me, they still have more toys than they need, but I was able to find a good amount that were no longer of interest to my kids. I took our discarded toys to a local children’s consignment store and sold many of the items.  I received store credit (you can also get cash back) to use on future clothing purchases for my children. Mom win!

Guys, this is a section of my closet before the decluttering began. What you do not see is is the countless amount of shoes on the ground and clothes about to pop out of the drawers. Stay tuned for the after! I am currently on the 3rd round of my closet declutter which has resulted in close to 20 garbage bags of clothes to be given away.


Save

Save

Save

Save

Save

Continue Reading

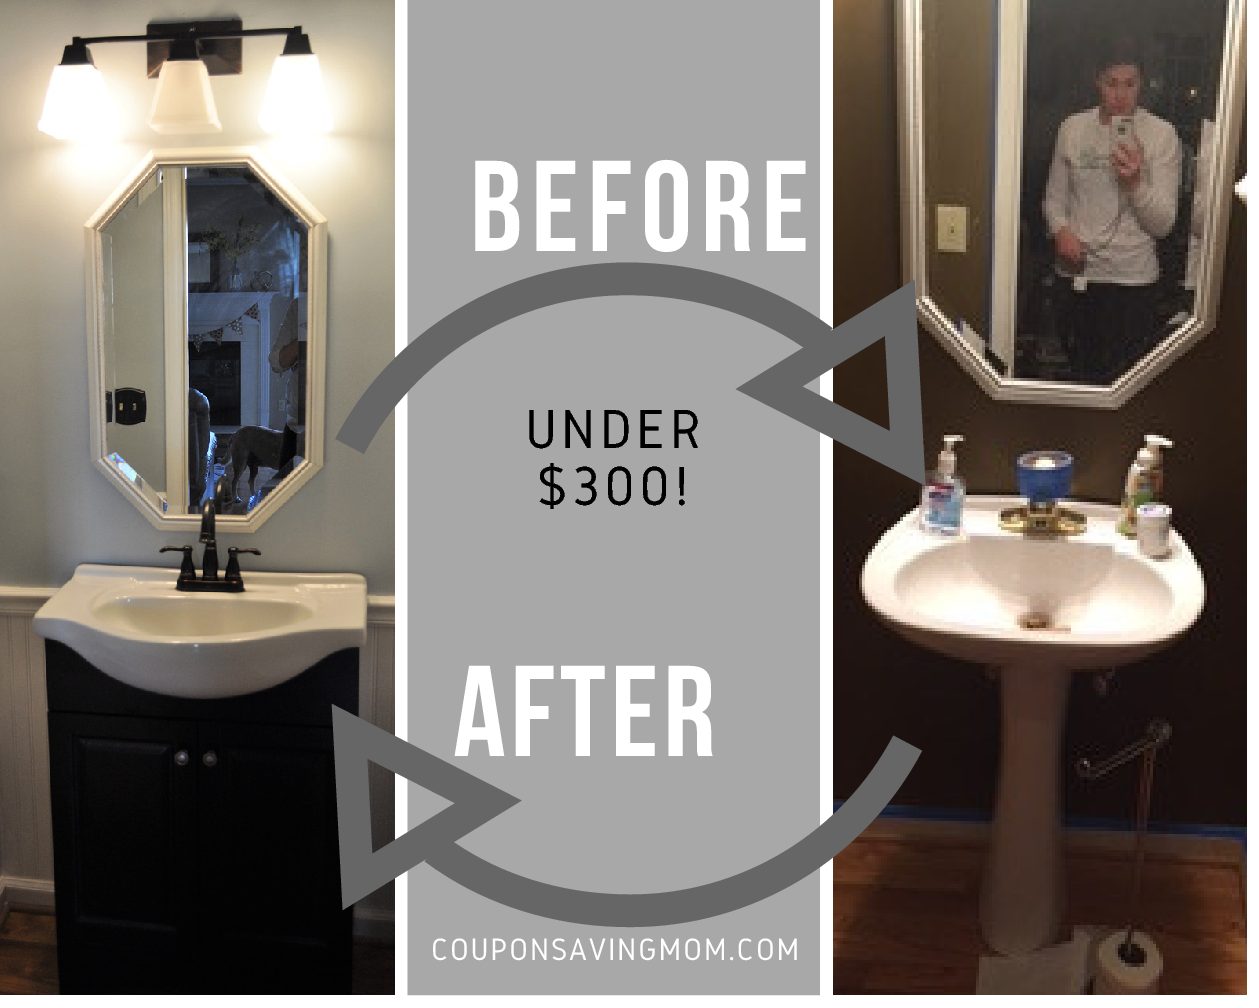
DIY: Bathroom Reno Under $300!

I  had our main level half bathroom on my “to-do list” since the day we bought our home. It initially had “lovely” navy, gold, and burgundy wall paper that was removed the first few months after moving into our home. At the time I opted to just paint with some leftover paint in the garage, hence the brown. It was not our first choice, but I didn’t want to spend money to repaint and remodel the bathroom so brown it was.

I had been looking for some Pinterest inspiration and ran across this photo. I knew with the small space we were working with that I would only be able to incorporate a few of these inspirations.

Off to Home Depot we went…

First order of business was to remove all photos, mirrors, the old sink, mirror and tape around the existing crown molding. As a learned tip, remove your base boards before painting if you are putting in bead board. Being our first time installing bead board, we left the base boards while painting for them only to be removed later.  It would have made painting much easier if they were removed first.

After two coats of paint (paint & primer in one), we removed the base boards and installed the bead board. Since we were working with a smaller space this was a fairly quick process.

Once the bead board was installed then we reapplied the base boards and installed the chair rail at the top. I painted two coats of white paint (left over) to the bead boards, base boards and chair rails to give everything a smooth finish.  The natural texture of bead boards will hold all scratches, scrapes and fingerprints.  I HIGHLY suggest painting these once they are installed to eliminate toddler fingerprints from being the artwork in your new bathroom :).  After touch up paint and installing the new vanity and mirror we were done!

I did want to mention that I opted to go for a different vanity because we needed some extra storage in the bathroom.  We choose an inexpensive and small vanity. If you currently have a vanity that has storage you can save even more money by giving your vanity a fresh coat of paint! That was not really an option for us since we only had a sink, but I do plan to use this method when we “spruce” up our other bathrooms.

how to paint your vanity

This project could have easily been finished during the course of a few days (or weekend). We began late on a Saturday and had most completed by Sunday night.  We were not fully able to finish until the following weekend since our toddler wanted to help and we have a 9 month old that thinks anything on the floor is on the menu.

VIOLA!

My lovely friend made me the artwork, which is what inspired me to mark this off my to-do list. I told myself that I was not going to hang this until I completed our reno and I was so excited to see it hung in the new space!

BowenArrowCreations

Supplies:

Paint: $30 (paint and primer in one)

Bead board: $60

Chair rail: $30

Vanity: $110 (if you opt to paint your own it would save $$!)

Glue (for bead board): $3

Lighting: $20 (found on a clearance a few months ago)

Items we already had:

Brushes, mirror, caulk, nail gun, nails and white paint.

Overall, under $300!

Save

Continue Reading

8 simple ways to save money on meat

1.) Stock up price

Before you try and get the best prices on meat, you must know your stock up price for each type of meat. This can vary for each person depending on what meat you typically use and buy more often.

For my family, we eat chicken for most meals. Chicken is usually a cheaper meat option; therefore, I am able to stock up on different cuts of chicken for fairly cheap. For example, my stock up price for chicken leg quarters (leg and thigh) is .39 cents per pound.  That equals out to about $2.00 per every 7 pounds of chicken!

If your family tends to eat more red meat then you may pay a little more, but you can still find low stock up prices! A good rule of thumb is to look for the normal price per pound and to aim to pay half that price.  For example, if you currently pay $3.99 per pound of ground chuck, aim to stock up when the price is $1.99 per pound.


2.) Buy discounted

Many stores will discount their meat when it is getting close to the “use by” date. Stores will generally put a sticker on the discounted meat.  Look for red, yellow and brightly colored stickers when searching. I have been able to find meat prices marked as low as 80 percent off.  Sometimes I get lucky enough to get meat for free.

Target always has excellent mark downs on their meat selection. Target will have red stickers with a certain dollar amount of the price.  For instance, $3.00 off, instead of putting a discount price.  Sometimes you can find meat that is already on sale, plus the discounted dollar amount, plus Targets free 5% off! I know Target is not a common place to think of when buying meat, but the next time you are browsing around the store stopover in the meat section!


3.) Shop meat sales

Meat sales are more common at smaller grocery stores such as Harris Teeter, Lowes Foods and Food Lion than larger stores like Walmart and Target. Common meat sales are buy one get one free (half price) or lowering the price per pound for that sales week. Pot roasts, stew meat and cubed steaks go on sale for buy one get one free every couple of weeks at my local grocery stores.


4.) Use leftovers

Use leftover meat from the night before to create a new meal the next day.  Whenever we have leftover meat, I alter my dinner menu to incorporate the leftovers so that they don’t go to waste.  This is also a great way to save money as you are using the same meat for multiple meals.

For example, when we have leftover chicken, I will normally make tacos, quesadillas or a casserole that uses chicken. When I am not able to come up with meal ideas with our leftover meat (hello, mom brain!) then I pull up Pinterest or Google and type “leftover _____ recipes” and voila!  Minimal thinking involved…


5.) Buy in bulk

You can save a lot of money by buying larger portions of meat and cutting them yourself.  The other day I purchased a 10 lb. pork shoulder on sale for $1.27 per pound and was able to cut the meat to last 7-8 meals!  That is less than $2.00 per meal.

You can also buy bulk meat from places such as Zaycon and your local butcher.  These will typically have a higher up front cost due to the amount of meat you will purchase (40 pounds and up). A great idea is to team up with a friend or family member to split the upfront cost.


6.) Coupons

Yes, there are coupons for meat! It is a common misconception that coupons are only for snack foods.  You can find coupons for produce, diary and MEAT!

These can be found in the Sunday paper, online (check out the page for printable coupons) and through cashback apps (Ibotta, SavingStar & Checkout 51).


7.) Eat less meat

Every meal does not have to include meat.  I repeat, every meal does not have to include meat. There are many easy to follow and delicious recipes that do not include meat. If you and you are willing, try incorporating “meatless Mondays” (or any other day of the week). I am not saying that every meal needs to be “vegetarian”, but try to have one meal be meatless.  If you are currently spending $6.00-7.00 per meal on meat, then that saves you $24-$28 per month on meat. Simply by cutting out meat from one meal per week!

If you are like my husband and refuse to eat a meal without meat, then try to cut back on the portion used in the meal. You can also supplement some meat with beans, lentils and rice to make the meal more filling.


8.) Check the fresh meat

If your store has a fresh meat section (where the meat is cut) check to see the prices of the cuts per pound for their un-packaged meats. At Harris Teeter, the price per pound for chicken breasts is $1.99/lb.  If you look at the price for the SAME chicken breasts that is packaged it is $3-$4 per pound! Often meat and seafood in the fresh meat section will also be on a weekly sale or a manager special. A manager special simply means that the product is being reduced. Often to help with sales.


Take advantage couponers!

Save

Save

Continue Reading

Where to find coupons

1.) Sunday Paper

The Sunday paper is where you will find the bulk of your coupons.  The three inserts that distribute coupons are Proctor & Gamble (P&G), Redplum (RP), and SmartSource (SS).

It is important to know that some weeks there may only be (1) insert and another week may have up to (5) inserts.  This is determined by the weekly insert schedule. You can find the entire schedule for the year here.

Just keep in mind that not all regions receive the same coupons.  You may receive a coupon for .50 cents off an item and the neighboring town may receive .75 cents off the same product.

2.) Online

If you haven’t had time to build your coupon “stash” do not be discouraged!  If you have a computer, tablet or smart phone and a printer you can have coupons in no time! There are so many places online that you can print coupons. The most common sites to print coupons are coupons.com, smartsource.com and redplum.com.

Many brands offer coupons directly from their website.  Think of brands such as Kelloggs, Betty Crocker, Hefty and more!

Most coupons will only allow you to print each coupon (2) times per device. If you need to print more than (2) coupons then you will have to print from another device such as your tablet.

When you see coupons online that you are interested in and think you will use, then I would suggest you print right away.  Most coupons have a limit and once the limit of the coupon has been printed then the coupon will disappear. Coupons generally expire within a month of printing (that can vary) so you should have plenty of time to use even if you don’t need the coupon at that moment.

3.) Mail

Many brands and stores will send coupons directly to your home if you sign up for different programs that are offered.  I occasionally will receive coupons for free items from stores like Food Lion.  Harries Teeter is also known for sending out $10 off $50 or more purchases and Target loves to send coupons for many different items!

4.) Store cards

Some store cards will have electronic coupons that you can add directly to your store loyalty card.  Electronic coupons will vary from store to store.  Some stores will allow you to use electronic coupons with manufacturer coupons and some will not.  You can check if your store is listed here, and then review their electronic coupon policy.

5.) In the store

You can find some awesome coupons directly in the store itself!  Many manufacturers will place coupons directly on the product by either “hangtags” or “peelie” coupons. You can also find coupons on “tearpads” and “blinkie” machines.  Both are generally located near the advertised product.

Have you ever been at check out and receive those coupons that print with your receipt that you probably throw away? DON’T! Sometimes those coupons are GOLD!  I have been able to get many free items using those coupons from the “catalina” machines.  Many times, the coupon will print off to redeem for a free item! Always look at those the next time you are shopping and store them in your binder or file for future use.

Hope this helps on beginning your couponing journey!

Save

Save

Save

Continue Reading

10 Brilliant Thrift Store DIYs

I am a big fan of thrift stores. I find excitement in the idea of possibility finding something really cute, quirky or one of kind. Thrift stores are also an excellent place to find items to make your own without spending a ton of money to add the “pop” to your house. I put together some fantastic ideas of really easy projects that you can do from some very common thrift store finds.

Easy and cute book ends.

Find project here


This would be beautiful in a bathroom.

Find project here


This may be my next DIY project!

Find project here


How awesome would this be for the kiddos?

Find project here


This would be a lovely gift.

Find project here


I already have so many doilies to use for this project.

I love the blend of old and modern!

Find project here


My dad used to have a pair of these. I wish I would have seen

this before they were donated!

Find project here


How cute for an entry table or desk?

Find project here


Simple and easy with items you probably already have.

Find project here


Love this for a bathroom or powder room!

Find project here

I hope you found these as inspiring as I did!  If you have your own DIY projects please share in the comments below.  I would love to see everyone’s creative ideas. Now I am off to Goodwill…

Save

Save

Save

Continue Reading